Right then, fancy giving your walls a bit of a refresh with some plaster? It can look like a dead easy job, can’t it? Just slap it on and away you go. But honestly, if you don’t get it quite right, you can end up with a right mess. We’ve all seen those DIY disasters, haven’t we? To save you some bother and keep your walls looking tip-top, here are some common plastering mistakes to steer clear of.
Key Takeaways
- Don’t even think about starting until the surface is spotlessly clean and ready. Any dust or grease is a big no-no.
- Get the mix right. Too much water or not enough can ruin the whole lot before you even start.
- The right gear makes all the difference. Using the wrong trowel or tools will just make life harder.
- Think thin layers and patience. Trying to rush it or slap it on too thick is a classic blunder.
- Corners and edges need just as much love as the big flat bits, otherwise, it’ll look unfinished.
1. Skipping Surface Preparation
Right then, let’s talk about the absolute bedrock of any decent plastering job: getting the surface ready. Honestly, this is where so many DIYers trip up, and it’s a shame because it’s not even the tricky bit. If you don’t prep your walls or ceilings properly, you’re basically setting yourself up for a whole heap of bother down the line. Think cracks, peeling bits, and a finish that just looks a bit… sad.
First off, you’ve got to make sure the surface is clean. We’re talking dust, cobwebs, old flaky paint, grease from the kitchen – all that gunk needs to go. A quick wipe-down with a damp cloth or a good vacuum usually does the trick for dust. For anything a bit more stubborn, like grease, a mild detergent can sort it out. Just make sure it’s bone dry before you even think about slapping on any plaster.
Then there’s the ‘key’. Plaster needs something to grip onto, right? If you’re plastering over something super smooth, like old gloss paint or concrete, it’s going to struggle to stick. You might need to give it a bit of a rough-up. Scoring the surface lightly with something sharp or even a bit of a sand can help create a bit of texture. Alternatively, a good quality bonding agent is your best mate here. Roll it on, let it dry according to the tin, and it gives the plaster something proper to cling to.
And don’t forget to check for any loose bits or damage. Plastering over a wall that’s about to crumble isn’t going to magically fix it. Any holes, cracks, or dodgy bits of plaster need sorting out first. It might seem like extra work, but trust me, it saves you a massive headache later on.
Rushing this stage is like building a house on sand. It might look okay for a bit, but eventually, it’s going to show its weaknesses.
Here’s a quick rundown of what to look out for:
- Dust and Dirt: Hoover or wipe down thoroughly.
- Grease and Grime: Use a mild detergent and ensure the surface is dry.
- Smooth Surfaces: Score, sand, or apply a bonding agent for grip.
- Loose or Damaged Areas: Repair any cracks, holes, or crumbling plaster before starting.
2. Incorrect Plaster Mixing
Right then, let’s talk about mixing plaster. This is where a lot of DIYers trip up, and honestly, it’s not that complicated if you get it right from the start. The consistency of your plaster mix is absolutely key to a good finish. Get it wrong, and you’re setting yourself up for a world of pain later on, with cracks, sagging, or a surface that’s just a nightmare to smooth out.
So, what’s the deal? Well, it usually comes down to water. Too much water and your plaster will be like soup – runny, impossible to control, and it’ll just slide off your trowel. Not enough water, and it’ll be a stiff, crumbly mess that you can barely spread. You’re aiming for something like a thick, creamy batter that holds its shape on the trowel without dripping off. It should feel smooth, not lumpy.
Here’s a quick rundown of what to watch out for:
- Water Ratio: Always follow the manufacturer’s instructions on the bag. They’ve tested it, so trust them! Measure your water accurately; don’t just guess.
- Mixing Thoroughness: Give it a good, solid mix. You want all the powder to be fully incorporated into the water. Lumps are the enemy here. A clean bucket and a decent mixer (even a sturdy stick will do in a pinch, but a drill with a mixing paddle is better) are your friends.
- Batch Size: Don’t mix up a massive amount thinking you’ll save time. Plaster starts to set once it’s mixed with water, and if you’ve got too much, it’ll go hard before you can even get it on the wall. Mix only what you can comfortably use within about 20-30 minutes. It’s better to mix a bit more later than to throw away a bucket of wasted plaster.
Getting the mix right means you’re halfway to a smooth, professional-looking finish. It’s worth taking a few extra minutes to get this bit spot on before you even think about applying it to the wall. A well-mixed plaster is the foundation for everything else.
Remember, a good mix makes the whole process easier. If you’re struggling to get the consistency right, it might be worth checking out some guides on plaster mixing techniques to see what a proper mix looks like.
3. Wrong Tools
Right then, let’s talk tools. You wouldn’t try to build a house with a butter knife, would you? Well, plastering is much the same. Using the wrong gear is a surefire way to make a mess and end up with a finish that looks like it’s been attacked by a badger. It’s not just about having any tools, it’s about having the right ones.
Think about your trowel. Too big and you’ll be wrestling with it, leaving massive ridges. Too small and you’ll be there all day, probably developing a serious case of RSI. You need a decent plastering trowel, something that feels balanced in your hand. For fiddly bits, like around windows or awkward corners, having a smaller hawk and trowel is a lifesaver. Honestly, investing in a few good quality tools will save you so much grief.
And it’s not just trowels. You need a good mixing bucket – one that’s sturdy and easy to clean. A plastering hawk (that flat paddle thingy) is pretty essential for holding plaster as you work, and a float helps smooth everything out. Don’t even think about trying to mix plaster with a broken-down old whisk; you’ll end up with lumps the size of golf balls. A proper paddle mixer attachment for your drill is a game-changer. If you’re serious about getting a smooth finish, you’ll need a spirit level and a straightedge too, to make sure everything’s nice and level.
Trying to skimp on tools is a false economy. You’ll end up spending more time and effort trying to fix the mistakes caused by inadequate equipment, and the final result will probably be disappointing. It’s worth getting the right kit from the start.
Here’s a quick rundown of some must-haves:
- Trowels: A good main trowel and a smaller one for detail work.
- Hawk: To hold your plaster while you work.
- Float: For smoothing and finishing.
- Mixing Paddle: For your drill, to get a consistent mix.
- Buckets: Sturdy ones for mixing and carrying water.
- Spirit Level & Straightedge: To check for flatness.
Using the correct tools makes the whole process so much easier and, dare I say it, even a bit enjoyable. Plus, it means you’re less likely to damage your expensive equipment, like those fancy taping machines, by using the wrong type of plaster compound with them. It’s all about matching the product to the job and the tools you’re using. For more on professional finishes, you might want to look into professional plastering services.
4. Improper Application Techniques
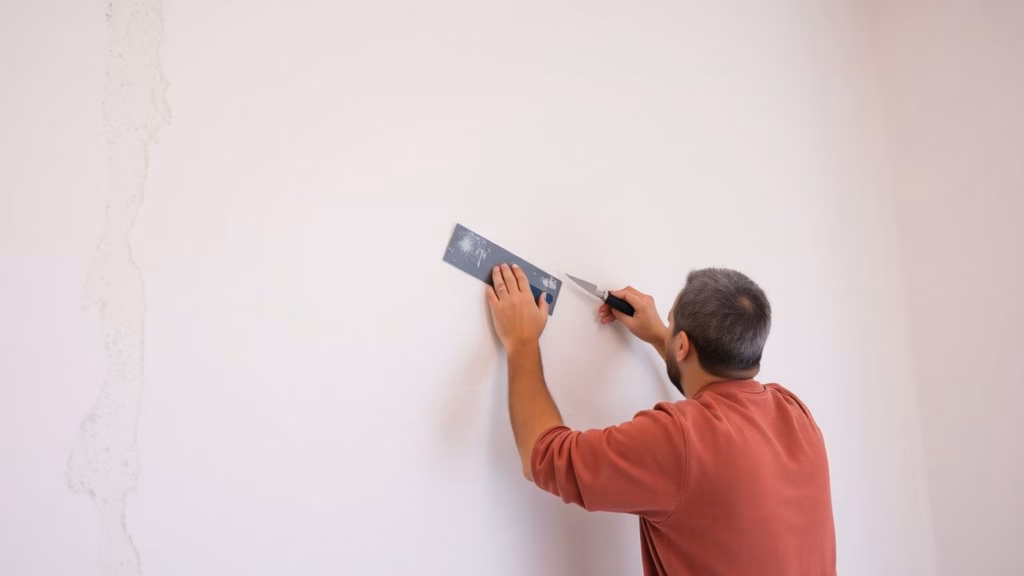
Right then, let’s talk about actually getting the plaster onto the wall. This is where things can go a bit pear-shaped if you’re not careful. It’s not just about slapping it on; there’s a bit of a knack to it.
First off, how you hold and move that trowel makes a massive difference. If you’re pressing too hard or at a weird angle, you’ll end up with ridges and marks that are a nightmare to get rid of later. Try to keep your pressure consistent and use long, smooth strokes. Think of it like spreading butter on toast, but, you know, with plaster. You want it even, not all lumpy.
Another thing is not giving the plaster enough of a chance to adhere. Especially on really smooth surfaces like old painted walls or concrete, plaster can just slide right off if you don’t prep it properly. You might need to use a bonding agent first. It’s a bit of an extra step, but trust me, it stops you from having a plaster disaster down the line.
Here’s a quick rundown of what to aim for:
- Consistent Pressure: Don’t dig in or skim too lightly. Aim for an even spread.
- Correct Angle: Hold your trowel at a slight angle to the wall, not flat against it.
- Smooth Strokes: Long, sweeping movements are better than short, choppy ones.
- Work Systematically: Don’t jump around. Work in sections so you don’t leave gaps or miss spots.
You’ve got to get the feel for it. It’s a bit like learning to ride a bike; you’ll wobble a bit at first, but with practice, you’ll get smoother. Don’t be afraid to do a small test patch somewhere out of the way if you’re unsure.
And don’t forget about the edges and corners! They’re often the bits that let the whole job down if you’re not careful. We’ll get onto that next, but for now, focus on getting that main surface looking good.
5. Neglecting Edges and Corners
Right then, let’s talk about the bits that often get a bit of a rough deal – the edges and corners. It’s easy to get caught up in getting the main wall looking smooth, but if you skimp on these areas, the whole job can look a bit shoddy, can’t it? These are the bits that really show if you’ve paid attention to detail.
Think about it. A nice, crisp corner makes the whole wall look sharper. If it’s all rounded off or uneven, it just screams ‘amateur’. The same goes for edges where the plaster meets the ceiling or skirting board. You want a clean line, not a messy, lumpy transition.
Here’s the lowdown on getting them right:
- Use corner beads: For external corners, these are your best mate. They’re usually metal or plastic strips that you embed into the plaster. They give you a guide for a perfectly straight edge and also protect the corner from knocks.
- Trowel with care: When you’re finishing off, pay extra attention to the edges. Use the edge of your trowel to neaten things up. It takes a bit of a steady hand, but it’s worth it.
- Don’t forget the internal corners: Where two walls meet, or a wall meets the ceiling, you need to get that angle just right. Sometimes a smaller trowel or a filling knife can help get into these tighter spots.
It’s all about taking that extra minute. You might think it’s not a big deal, but those little details make a massive difference to the final look.
Honestly, I’ve seen jobs where the main wall was decent, but the corners were a mess. It just ruins the whole effect. It’s like wearing a smart suit with scuffed shoes – it just doesn’t quite work, does it?
6. Misjudging Plaster Setting Times
Right then, let’s talk about plaster setting times. This is one of those things that sounds simple, but honestly, it trips up a lot of people. You’ve mixed up your plaster, you’re feeling good, ready to get it on the wall. But here’s the catch: plaster doesn’t wait around forever. Different types of plaster have different ‘pot lives’, which is basically how long you’ve got before it starts to go off, or set.
If you mix up way too much, thinking you’ll save time later, you’ll probably end up with a load of hard, unusable gunk in your bucket. That’s just a waste of money and effort, isn’t it? On the flip side, if you’re too slow, the plaster on the wall might start to set before you’ve even finished spreading it. This makes it a nightmare to get a smooth finish, and you’ll end up with lumps and bumps that are a pain to sort out later.
The key is to work with the plaster, not against it.
Here’s a bit of a breakdown:
- Know your plaster: Different plasters have different setting times. A quick-setting plaster might only give you 15-20 minutes, while a slower one could give you up to an hour. Always check the manufacturer’s instructions on the bag. It’s not just a suggestion, it’s pretty important.
- Mix in batches: Don’t be a hero and mix a massive amount. Mix only what you can comfortably apply within about 20 to 30 minutes. You can always mix more if you need it. It’s better to have a few small mixes than one giant, unworkable mess.
- Have everything ready: Before you even think about adding water to the powder, make sure all your tools are clean and ready to go. Your hawk, trowel, floats – everything. This way, you’re not scrambling around looking for something when the clock is ticking.
- Watch the weather: Believe it or not, the temperature and humidity can affect how quickly plaster sets. Hot, dry days will make it go off faster, while cold, damp conditions can slow it down. You need to factor this in.
Trying to rush the process because you’ve misjudged the setting time often leads to more problems than it solves. You might end up overworking the plaster, which can weaken it, or you might not get it smooth enough, leading to extra sanding or even having to re-do sections. Patience and planning are your best mates here.
So, next time you’re plastering, give a thought to how long you’ve got. It’s a simple step, but it makes a massive difference to the final result and saves you a lot of hassle.
7. Overworking the Plaster

Right then, let’s talk about overworking the plaster. It sounds a bit odd, doesn’t it? Like you’re trying too hard to make it perfect, but actually, you can mess things up by doing just that. When plaster starts to firm up, if you keep on trowelling it, you can actually break down its structure. This means it loses that nice, smooth finish and can end up cracking later on. It’s a bit like trying to smooth out a dent in a cake after it’s started to bake – you just end up making a mess.
The key is to know when to stop. You want to get it looking good, obviously, but there’s a point where you need to let it be. If you’re constantly going over the same spot, especially as it begins to set, you’re not helping. You might think you’re getting it smoother, but you’re probably just making it weaker and more prone to problems down the line. It’s all about timing and a gentle touch.
Here’s a quick rundown of what to watch out for:
- Don’t keep trowelling once it’s firming up: This is the main culprit. Stop the aggressive smoothing and let it start its natural setting process.
- Focus on polishing, not reshaping: Once it’s mostly set, any further work should be about a light polish, not trying to fix major imperfections. For that, you’d ideally want to catch them earlier or do a skim coat later.
- Watch for the sheen to disappear: As plaster starts to set, it loses its wet sheen. This is a good visual cue that it’s time to ease off the trowel.
It’s easy to get caught up in trying to achieve that flawless finish, but sometimes, less is more. Pushing the plaster too much when it’s in that critical setting phase can undo all your hard work. Patience is definitely a virtue here, and knowing when to step away is just as important as knowing how to apply it in the first place. If you’re struggling with the basics of plaster repair, checking out some expert tips for fixing cracks and holes can be a good starting point repairing plaster walls effectively.
Think of it like this: you’ve got a certain window of time to work the plaster. Once that window starts closing, you need to back off. Trying to force it will just lead to more work later, which is the opposite of what we want. So, keep an eye on the consistency and don’t be tempted to keep fiddling with it for too long.
When plastering, it’s easy to get carried away and apply too much. This can lead to problems down the line, like cracking or the plaster not drying properly. It’s important to remember that a little goes a long way, and multiple thin layers are often better than one thick one. For expert advice on all things plastering, check out our services page on our website.
So, What’s the Takeaway?
Right then, we’ve gone through a fair few plastering pitfalls, haven’t we? It really does show that while plastering might look simple on telly, getting it spot on takes a bit of know-how and, let’s be honest, some patience. Avoiding these common blunders – like not prepping properly or using the wrong gear – should make your DIY plastering job a whole lot smoother. If you’re staring at a wall thinking, ‘Crikey, this is a bit much,’ don’t be afraid to call in someone who does this for a living. Sometimes, a bit of professional help is the smartest move. But if you’re determined to give it a go, just take your time, follow the steps, and you’ll likely end up with a finish you can be chuffed with.
Frequently Asked Questions
What’s the biggest blunder folks make when plastering themselves?
Honestly, the most common slip-up is not bothering to prep the surface properly. If you don’t get rid of all the dust, grease, or loose bits, the new plaster just won’t stick like it should. This often leads to nasty cracks or bits peeling off later, which is a real pain to fix.
How do I get that super smooth finish everyone talks about?
It’s all about using a decent trowel and applying the plaster in thin, even layers. Keep an eye out for any bumps or dips and smooth them off straight away with a straight edge. Consistent pressure when you’re smoothing is key too – don’t go too hard or too light.
Can I just slap some paint on as soon as the plaster feels dry?
Nope, definitely not! Plaster needs a good long while to fully cure, not just dry on the surface. You’re usually looking at least a week, sometimes longer, to let all the moisture escape. If you paint too soon, the paint can bubble up or peel off, and it can also trap moisture that weakens the plaster underneath.
How do I pick the right plaster for my job?
You’ve got to think about where you’re plastering and what it’s like. For most indoor walls, a gypsum plaster is usually the go-to. If you’re dealing with somewhere damp or outside, you’ll want something tougher like a cement-based plaster. If you’re not sure, have a chat with someone at the builders’ merchant.
Is plastering something I should try if I’ve never done it before?
Well, it’s not rocket science, but it does take a bit of practice. If you’ve got a big job or a really important wall, it might be worth getting a pro in to do it, or at least help you out. For smaller bits, or if you’re just keen to learn, start with a small, out-of-the-way area to get the feel for it. That way, you can make mistakes without it being too obvious!
What’s the deal with plaster setting times?
Basically, different plasters dry and harden at different speeds. You really need to know what you’re working with. If you mix up too much and it starts to go hard before you’ve even put it on the wall, you’ve wasted it. And if you’re too slow, you might end up rushing and doing a shoddy job. So, have all your gear ready before you even think about mixing!